Gel Nail Polish Benefits, Application, Removal & Best Brands in Pakistan Everything You Need to Know

You paint your nails. They look perfect. Then three days later a chip. Sound familiar? That frustrating cycle is exactly why millions of people have switched to gel nail polish. It stays on longer, looks shinier and simply holds up better in real life. Whether you’re washing dishes, typing all day or chasing after kids, gel polish doesn’t budge the way regular nail polish does.
Gel nail polish has completely changed the beauty world. It’s no longer just a salon luxury today, you can do a full home gel manicure with an affordable kit and get results that rival any nail salon treatment. And if you’re shopping in Pakistan or curious about gel nail polish price in Pakistan, there are now more options than ever before from budget picks to salon-quality nails that look absolutely stunning. This guide covers everything: the science, the steps, the safety and the best gel nail polish Pakistan has to offer.
Read More About: Nail Designs 2024 25 Trendy Nail Art Ideas You’ll Want to Copy
What Is Gel Nail Polish?
Gel nail polish is a type of nail color that hardens under UV light or an LED curing lamp. Unlike standard nail polish that air-dries, gel stays wet until you cure it with a nail lamp. That curing process bonds the polish to your nail and creates a rock-solid, glossy nail finish that lasts for weeks.
The formula itself contains special ingredients called acrylate and methacrylate compounds. These are the molecules that react to light and harden the polish. Soak-off gel polish the most popular type today is designed to come off with acetone without damaging your nail. It became widely popular in the early 2000s and has only grown since then. Today, gel nail color is a staple in salons and homes worldwide, including a rapidly growing market across Pakistan.
How Gel Nail Polish Works
Here’s the simple science. Gel nail polish contains photoinitiators tiny molecules that react when exposed to UV light or LED light. The moment light hits the gel, those molecules trigger a chemical chain reaction called polymerization. The liquid gel literally transforms into a hard, plastic-like coating in seconds. That’s why nail polish curing is so fast and effective.
The system works in three layers. First comes the gel base coat, which grips the nail plate. Then comes the gel nail color coat usually applied twice. Finally, the gel top coat seals everything and gives that signature shine. Each layer needs to cure under a UV nail lamp or LED nail lamp before the next one goes on. The whole process takes about 30 to 45 minutes, and the result is a manicure that can last two to four weeks without chipping.
| Layer | Purpose | Cure Time (LED) |
| Base Coat | Bonds gel to nail | 30–60 seconds |
| Color Coat (x2) | Adds color and opacity | 30–60 seconds each |
| Top Coat | Seals and adds gloss | 60 seconds |
Gel Nail Polish vs Regular Nail Polish
If you’ve ever wondered why gel nail polish costs more than a regular bottle of lacquer, the answer is simple it performs better in almost every way. Standard nail polish air-dries, but it stays slightly flexible and soft for hours. That’s why it smudges, chips and dulls so fast. Gel polish, on the other hand, cures into a hard shell that resists chips, scratches and everyday wear far better.
The trade-off is removal. Regular nail polish comes off with any polish remover in minutes. Gel nail polish removal requires acetone soak off, which takes more time and care. Still, for people who want their nails to look perfect for weeks not days long-lasting nail polish in gel form wins every time. Here’s a clear side-by-side breakdown:
| Feature | Gel Polish | Regular Polish |
| Dry/Cure Time | 30–60 seconds under lamp | 15–30 minutes air dry |
| Longevity | 2–4 weeks | 3–7 days |
| Finish | High-gloss, mirror-like | Can dull within days |
| Chip Resistance | Excellent | Low to moderate |
| Removal Method | Acetone soak off | Regular remover |
| DIY Friendly | Yes (with kit) | Yes |
| Cost | Higher | Lower |
Benefits of Gel Nail Polish
The benefits of gel nail polish go far beyond just looks. Yes, it’s gorgeous but it’s also practical. A professional gel manicure or even a well-done DIY gel nails session gives you nails that stay chip-free through workouts, cooking, cleaning and everything in between. For busy people who don’t have time to redo their nails every week, gel is a genuine time-saver.
Beyond durability, gel polish adds a layer of protection to the natural nail. The hardened coating acts like a shield. It helps prevent cracked nails and peeling nails that come from daily wear and tear. Many people with naturally weak or brittle nails find that wearing gel actually helps them grow their nails longer because the gel protects the nail plate from breaking. That’s a benefit no regular lacquer can offer.
Why Gel Polish Lasts Longer Than Traditional Polish
The reason chip-resistant nail polish like gel outlasts traditional lacquer comes down to chemistry. When gel polish cures under a LED curing lamp or UV nail lamp, it forms a cross-linked polymer network. Think of it like a chain-link fence every molecule connects to the next. That structure is incredibly strong and flexible at the same time. It bends slightly with your nail without breaking.
Regular nail polish doesn’t form this structure. It simply dries as solvent evaporates, leaving a film that can crack or chip under pressure. A nurse who washes her hands 50 times a day or a teacher who writes on a board constantly they’d ruin a regular manicure in two days. With long-lasting nail polish in gel form, they get two to three weeks of clean, professional-looking nails with zero touch-ups.
Glossy Finish and Chip Resistance
That mirror-like glossy nail finish is one of the biggest reasons people fall in love with gel manicure. Regular polish can look shiny on day one, but within a week it dulls and loses its luster. Gel polish stays glossy from day one to day twenty-one. The sealed gel top coat reflects light beautifully and maintains that just-done look far longer.
Chip resistance is the other major win. Because the gel is cured into a hard shell, it takes significant force to chip it. No smudging five minutes after application. No dragging your nails across fabric hoping they won’t ruin. Once you cure that top coat, your nails are ready immediately. That instant dry time combined with the glossy, chip-proof result makes gel nail color one of the most practical beauty investments you can make.
How to Apply Gel Nail Polish at Home
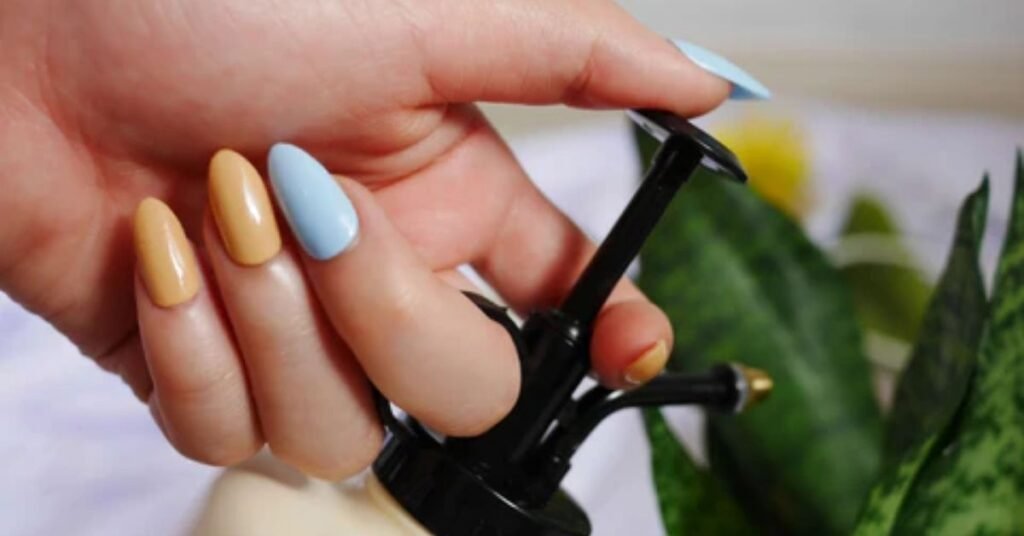
Doing a home gel manicure is totally achievable. You don’t need years of training. You need the right tools, a steady hand and some patience for your first few tries. Professionals use the same basic products the difference is just practice. With a quality DIY gel nails kit and the steps below, you can get salon-level results from your kitchen table.
Before you start, gather everything you’ll need. You’ll want a UV nail lamp or LED nail lamp, a gel base coat, your chosen gel nail color, a gel top coat, a nail file and buffer, a cuticle pusher, isopropyl alcohol or nail cleanser, lint-free wipes and acetone for any cleanup. Having everything laid out before you start makes the whole process smoother and prevents mistakes mid-application.
Sanitize and Prepare Your Nails
Nail prep is the most important step in gel nail application and the most skipped. If there’s any oil, moisture or old polish on your nail, the gel won’t bond properly and it’ll lift within days. Start by washing your hands thoroughly with soap and drying them completely. Use a lint-free wipe soaked in isopropyl alcohol to wipe each nail and remove all traces of oil from the nail plate.
Push back your cuticles gently using a cuticle pusher. Don’t cut them cutting cuticles opens the door to nail infection prevention problems. Cuticles are your nail’s natural barrier against bacteria. Just push them back to expose the full nail surface. Remove any old polish completely before moving forward. This step alone can be the difference between a manicure that lifts in a week and one that lasts a full three weeks.
Shape and Buff the Nail Surface
Once your nails are clean, shape them with a nail file to your preferred length and shape square, oval, almond or coffin. File in one direction only to avoid weakening the nail edge. Then take a fine-grit buffer and lightly buff the entire surface of each nail. This removes the natural shine and creates a slightly rough texture for the gel to grip.
Here’s the key don’t over-buff. Light buffing is all you need. Aggressive buffing thins the nail plate and can lead to nail plate damage over time, which contributes to weak nails after gel use. Once you’ve buffed, wipe each nail again with an alcohol-soaked lint-free wipe. Your nails should look matte and feel completely dry before you open that base coat.
Apply Base Coat and Cure
Apply a thin, even layer of gel base coat to each nail. Work carefully keep the gel off your skin and cuticles. If it touches the skin, it’ll peel away from that edge and lift the whole manicure. Use a thin brush stroke from the center of the nail, then the sides. Cap the free edge of the nail too that thin line along the tip seals the gel and helps prevent chipping at the tips.
Once all ten nails are done, place your hand under your LED nail lamp or UV nail lamp and cure according to the brand’s instructions usually 30 to 60 seconds for LED and up to 2 minutes for UV. The base coat may feel slightly tacky after curing that’s normal. Don’t touch it or try to wipe it off. That tackiness helps the color coat bond on top.
Apply Gel Color and Cure
Now for the fun part. Apply your first thin layer of gel nail color. Thin is the magic word here. A thick layer won’t cure properly all the way through and will bubble, wrinkle or peel later. Use smooth, even strokes and cap the free edge just like the base coat. Cure under your nail lamp for the recommended time.
After the first layer cures, check the coverage. Most gel nail colors need two coats for full, rich color especially lighter shades. Apply your second thin coat and cure again. Dark shades like deep burgundy or black sometimes need a third thin coat for full opacity. Just remember thin layers every time. Patience here pays off in a manicure that looks flawless for weeks.
Seal With Top Coat
The gel top coat is your final protective layer and it’s what gives you that stunning glossy nail finish. Apply it evenly across each nail and make sure you cap the free edge. This edge-capping step is crucial. It seals the tip of the nail and dramatically reduces chipping at the edge, which is where gel tends to wear first.
Cure the top coat under your nail lamp for the full recommended time. After curing, you’ll notice a slightly sticky or greasy feeling that’s the inhibition layer, a thin uncured surface left by oxygen exposure. Wipe it off with a lint-free wipe soaked in isopropyl alcohol. The moment you wipe it away, that brilliant mirror shine appears. Your DIY gel nails are done and completely dry no waiting required.
How to Remove Gel Nail Polish Safely
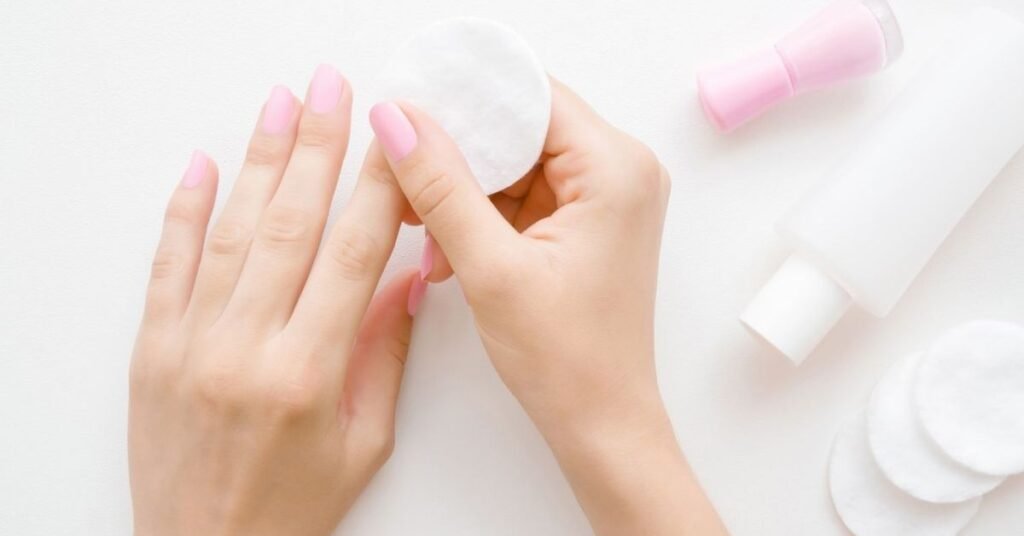
Gel nail polish removal done the wrong way is the number one cause of nail plate damage in gel wearers. Peeling it off feels satisfying in the moment but it rips layers off your natural nail with it. Safe removal takes a little longer but your nails will thank you. The standard method at home is the acetone soak-off technique, and it works brilliantly when done correctly.
You’ll need 100% acetone (not regular nail polish remover that won’t break down soak-off gel polish), cotton balls or pads, small squares of aluminum foil wrap, an orange stick or cuticle pusher, a nail file and a nail moisturizer for afterward. Give yourself about 30 minutes and find a comfortable spot. This isn’t a rush job.
Buff, Soak, and Wrap Method
Start by lightly buffing the shiny top coat off each nail. You don’t need to file all the way through just break the seal of the top coat so the acetone can penetrate. Once the shine is gone, cut small squares of cotton pad, soak them in 100% acetone and place one on each nail. Wrap each finger tightly with a small square of aluminum foil wrap to hold the cotton in place.
Wait 10 to 15 minutes. Set a timer and resist the urge to peek every 30 seconds. When time is up, squeeze the foil gently as you remove it. Most of the gel should slide off with the cotton. Use your orange stick or cuticle pusher to gently push off any remaining bits. Never scrape hard if it’s not moving, re-wrap and wait another five minutes. Finish by washing your hands and immediately applying cuticle oil and hand moisturizer to rehydrate the skin and nail bed.
Mistakes to Avoid During Removal
The biggest mistake people make is peeling or picking the gel off when it starts to lift at the edges. It feels tempting. Don’t do it. When you peel gel, you take the top layers of your natural nail with it. That’s what causes the thin, papery, peeling nails people blame on gel polish it’s actually caused by improper removal, not the gel itself.
Other common mistakes include using non-acetone remover (it simply doesn’t dissolve soak-off gel polish), skipping the buffing step (the acetone can’t penetrate the sealed top coat), leaving acetone on for too long (more than 20 minutes starts to seriously dry out the skin and nail plate) and not moisturizing immediately after. Nail dehydration after removal is real your nails and skin need hydration right away to begin recovery.
Read More About: Nail Designs 2025: 45 Trendy Nail Ideas & Inspo You’ll Want to Copy
Is Gel Nail Polish Bad for Your Nails?
This is the question every beauty lover eventually asks and it deserves a real, honest answer. Gel nail polish is not inherently bad for your nails. The gel formula itself doesn’t damage the nail. What causes gel nail damage is almost always technique improper application, over-buffing, peeling during removal or skipping aftercare. When done correctly, gel is safe for most people.
That said, some risks do exist. Repeated acetone removal dries out the nail over time. Overuse without breaks can contribute to nail brittleness and white nail spots those chalky patches you sometimes see after removal. Some people develop a gel polish allergy or acrylate allergy from long-term exposure to uncured gel. And UV exposure on hands during curing is a real though small concern. Let’s look at each of these more closely.
Common Problems With Gel Polish
Nail brittleness is one of the most common complaints after long-term gel nail treatment use. Over-buffing the nail surface before each application gradually thins the nail plate. After enough cycles, nails become thin, flexible and prone to breaking. Nail grooves, ridges and white nail spots can also appear after prolonged gel use these are signs of nail plate damage or mild nail dehydration.
Peeling nails are another frequent issue and again, usually caused by improper acetone removal or picking. Some people also experience skin irritation from gel polish or a full allergic reaction if they’re sensitive to methacrylate compounds. Symptoms can include redness, itching, swelling or contact dermatitis around the nail area. In rare cases, urticaria (hives) can develop. If you notice any of these signs, stop using gel immediately and see a dermatologist.
Can UV Lamps Damage Skin or Nails?
Yes, UV nail lamps do emit ultraviolet A rays. UVA exposure during curing is real, even if the doses per session are small. UV radiation from nail lamps has been studied, and while the risk from a single session is low, cumulative UVA exposure over months and years could theoretically contribute to skin aging and in very rare cases increase skin cancer risk on the hands.
LED curing lamps emit significantly less UV than traditional UV lamps and cure faster. They’re a safer choice if you’re concerned about UV radiation exposure. For those who still use UV lamps, applying sunscreen SPF 30 on the backs of your hands before each session is highly recommended. A mineral sunscreen with zinc oxide or titanium dioxide provides the best broad-spectrum protection. Alternatively, wear UV-protective gloves or fingerless gloves that cover the skin while leaving nails exposed during curing.
Gel Manicure Safety Tips
Gel manicure safety starts with choosing the right products. Look for non-toxic nail polish formulas that are HEMA-free (hydroxyethyl methacrylate-free) if you have sensitive skin or a history of acrylate allergy. HEMA is the compound most commonly linked to allergic reaction and contact dermatitis in nail clients. Many professional brands now offer HEMA-free versions of their gel lines.
Always make sure gel is fully cured before adding the next layer. Under-cured gel leaves uncured acrylate on the surface, which increases the risk of gel polish allergy developing over time. Never let uncured gel touch the skin. Keep application neat and precise. Visit a professional manicurist if you’re unsure a nail salon that follows proper hygiene and nail infection prevention protocols will always produce safer results than a rushed DIY job.
How to Protect Nails From Damage
Cuticle protection is one of the simplest and most effective ways to keep your nails healthy through gel cycles. Apply cuticle oil every single day even when you’re wearing gel. The oil absorbs through the gel and keeps the nail bed hydrated underneath. Jojoba oil, vitamin E oil and argan oil are all excellent choices that absorb quickly without feeling greasy.
Wear gloves while doing dishes, cleaning with chemicals or gardening. Acetone and harsh cleaning products strip moisture from nails fast. Avoid using your nails as tools opening cans, scratching off stickers or prying things open all put stress on the nail plate and cause breaks or lifting. Keep nails at a manageable length, especially during the first few gel cycles while you’re building up technique and your nails are adjusting to the treatment.
When to Take a Break From Gel Polish
Every nail health expert agrees on this you need to take breaks. After every three to four consecutive gel nail treatment cycles, give your nails two to four weeks of rest. During a break, use a nail strengthening treatment daily. Look for products containing keratin, calcium or biotin to help rebuild the nail plate and encourage healthy nail growth.
Signs that your nails urgently need a break include nails that look visibly thin or translucent, a chalky or white appearance after removal, nail grooves running horizontally, increased flexibility (nails that bend instead of break) and persistent nail brittleness. These are all signs of a weakened nail plate that needs time to recover before another gel application. Listen to your nails they tell you when they’ve had enough.
Caring for Your Nails After Removing Gel Polish
Post-removal nail care is not optional it’s essential. Think of it like skincare after a chemical peel. Your nails have been through a process. They need recovery time and the right products. The good news is that with consistent aftercare, nails bounce back relatively quickly. Most people see significant improvement in nail health within two to four weeks of dedicated care.
Nail recovery starts the moment you finish removing your gel. Don’t leave your nails bare and dry after an acetone removal session. The acetone strips moisture aggressively and leaves nails vulnerable. Immediately after removal, wash your hands, pat dry and apply a generous amount of cuticle oil followed by a rich hand moisturizer. Do this every single time you remove gel no exceptions.
Hydration and Nail Strengthening Tips
Nail hydration is the cornerstone of post-gel recovery. Cuticle oil applied daily morning and night makes a measurable difference in nail flexibility and appearance within just a week or two. The best oils for nail moisturizer purposes include jojoba (closest in structure to the skin’s natural sebum), vitamin E (an antioxidant that supports nail repair) and argan oil (rich in fatty acids that penetrate deeply).
A nail strengthening treatment applied every other day helps rebuild the nail plate during the nail recovery period. Look for formulas containing keratin, calcium, biotin or collagen. Some people also find that biotin supplements taken daily support healthy nail growth from the inside. Drink plenty of water nail hydration starts internally. File nails gently with a glass file and avoid metal files on weak nails after gel removal, as they can cause further splitting and cracked nails.
| Product Type | Key Ingredients | How Often |
| Cuticle Oil | Jojoba, Vitamin E, Argan | Twice daily |
| Nail Strengthener | Keratin, Calcium, Biotin | Every other day |
| Hand Moisturizer | Shea Butter, Glycerin | After every wash |
| Nail Treatment Base | Collagen, Proteins | Every 2–3 days |
| Biotin Supplement | Biotin (2500–5000 mcg) | Daily |
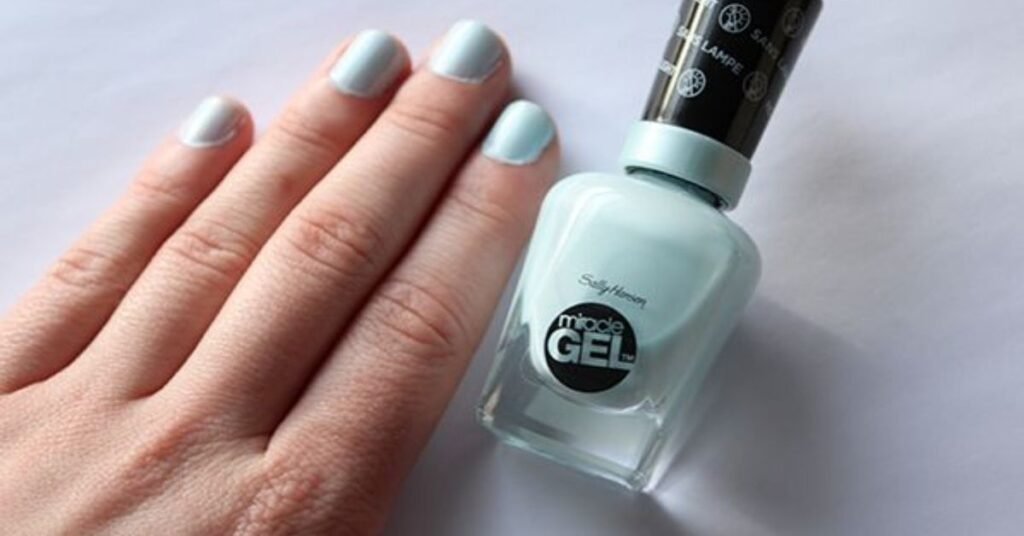
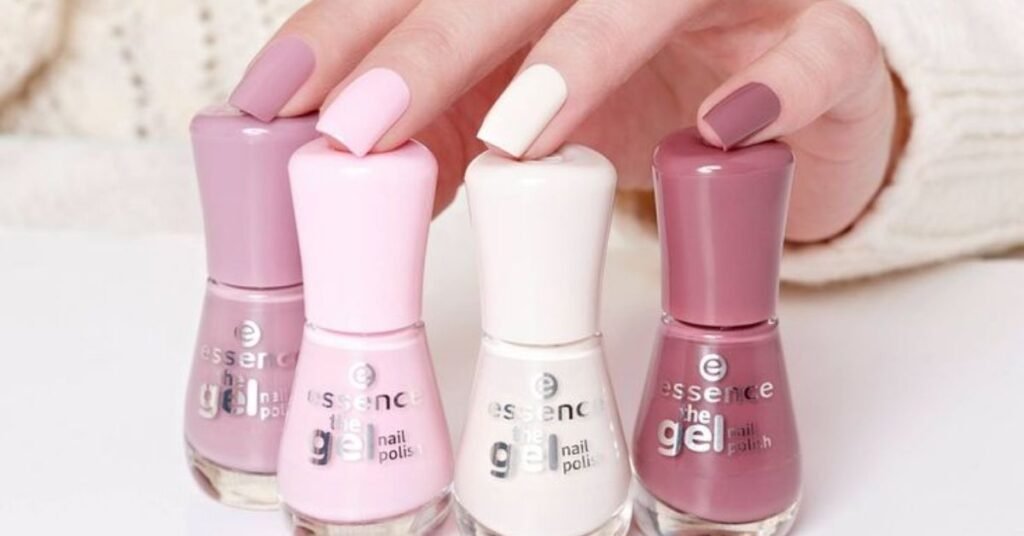
Best Gel Nail Polish Brands in Pakistan
Pakistan’s beauty industry has grown remarkably fast in recent years. Nail beauty trends have caught on in a big way from Karachi to Lahore to Islamabad, women are embracing salon-quality nails and investing in quality products. The best gel nail polish Pakistan market now offers ranges from local budget picks to internationally recognized professional brands that any professional manicurist would recognize.
Whether you’re doing DIY gel nails at home or visiting a nail salon for a professional gel manicure, knowing which brands to trust saves you money and protects your nails. Local brands have improved dramatically in formula quality and color range. International brands are also more accessible now through online platforms and specialty importers. Here’s a breakdown of both categories.
Affordable Gel Polish Brands
Rivaj UK is one of the most accessible and popular gel nail polish brands available across Pakistan. It offers a wide color range, decent longevity for the price point and is stocked in pharmacies and online on. Luscious Cosmetics is a proudly Pakistani brand that has developed gel-effect nail polish formulas they offer a glossy, long-wearing finish without requiring a lamp, making them a great gel-effect nail polish alternative for beginners.
Glamorous Face is another budget-friendly favorite, widely found at local cosmetic shops and beauty counters. Medora a classic name in Pakistani cosmetics has also expanded into longer-lasting formulas that rival gel finishes for casual wear. While these local brands may not offer the same durability as professional-grade gel systems, they give excellent value for everyday use and casual home gel manicure sessions. They also make excellent starting points for anyone exploring nail beauty trends without a huge budget commitment.
Premium Salon-Quality Gel Nail Polish
For those who want true salon-quality nails, internationally recognized brands like OPI GelColor, CND Shellac and Gelish are available through specialty importers and select high-end salons in Pakistan. CND Shellac is widely regarded as one of the best soak-off gel polish systems in the world it’s gentle on the nail, cures quickly and removes cleanly without excessive damage. Many top-tier nail salon brands in Lahore and Karachi stock CND Shellac as their signature service.
Gelish is another professional-grade gel nail treatment brand that nail techs across Pakistan swear by. Its formula is known for superior chip-resistant nail polish performance and a brilliant glossy nail finish that holds up for three to four weeks. Bio Seaweed Gel (BSG) is a newer entrant to the Pakistani professional market but is growing fast due to its non-toxic, eco-conscious formula. For those seeking non-toxic nail polish options with professional performance, BSG is worth seeking out through beauty importers.
Gel Nail Polish Price in Pakistan
One of the most searched topics for Pakistani beauty lovers is gel nail polish price in Pakistan and it varies quite a bit depending on whether you’re buying budget local brands, imported professional products or paying for a salon service. Here’s a realistic breakdown to help you budget your gel nail treatment experience.
Understanding the price landscape helps you make smarter decisions. A bottle of local budget gel nail color costs a fraction of a professional imported gel but the longevity and finish quality differ accordingly. If you’re just starting out, budget brands are a smart way to practice gel nail application before investing in premium products.
Budget Friendly Options
Local gel nail polish and gel-effect nail polish brands in Pakistan typically fall in the PKR 300 to PKR 800 range per bottle. Brands like Rivaj UK, Glamorous Face and Medora sit in this range and are widely available at pharmacies, cosmetic shops and on Buying a DIY gel nails starter kit which bundles a lamp, base coat, color and top coat often works out cheaper than buying everything separately and gives you everything to start your home gel manicure journey immediately.
For those on a tight budget, peel-off nail polish and gel-effect nail polish are also worth exploring. They don’t require a lamp, come off easily without acetone and are far gentler on the nail plate. They’re not true gel but as safer nail polish alternatives they’re an excellent choice for people with gel nail damage concerns or nail plate damage history.
Professional Salon Price Range
A mid-range nail salon treatment with gel polish in Pakistan typically costs between PKR 1,500 and PKR 3,500 for a full set. High-end salons in Karachi, Lahore and Islamabad particularly those using CND Shellac or Gelish charge anywhere from PKR 4,000 to PKR 8,000 or more for a professional gel manicure. Prices vary by city, salon reputation and whether nail art is included.
If you’re buying professional gel nail color bottles yourself, imported brands like OPI GelColor and Gelish cost between PKR 2,500 and PKR 6,000 per bottle through authorized importers. The higher cost reflects the superior formula, longer wear time and lower risk of gel nail damage. For anyone doing DIY gel nails seriously especially aspiring professional manicurist trainees investing in one quality brand is smarter than buying ten cheap ones.
| Option | Price Range (PKR) | Best For |
| Local Budget Brands (bottle) | 300 – 800 | Beginners, casual use |
| Mid-Range Salon Gel Manicure | 1,500 – 3,500 | Regular salon clients |
| High-End Salon (CND/Gelish) | 4,000 – 8,000+ | Premium experience |
| Professional Imported Bottle | 2,500 – 6,000 | Nail techs, serious DIYers |
| DIY Starter Kit | 2,000 – 5,000 | Home manicure beginners |
How Long Does Gel Nail Polish Last?
The honest answer is it depends. A well-done gel manicure using quality products on properly prepared nails can last anywhere from two to four weeks. A rushed application on oily, un-buffed nails using a cheap brand might start lifting in five days. The longevity of long-lasting nail polish in gel form is directly tied to how well you do every step of the process.
Several factors affect wear time beyond just the brand. Your lifestyle plays a big role. If you swim often, do manual labor, use strong cleaning products without gloves or type aggressively all day, your gel nail color will wear faster than someone with a desk job and gentle habits. Nail prep quality, lamp wattage, layer thickness and whether you cap the free edge all make a difference too. Here’s a realistic expectations guide:
| Gel Polish Tier | Application Quality | Expected Wear |
| Budget / DIY | Basic prep | 1–2 weeks |
| Mid-Range | Good prep | 2–3 weeks |
| Professional Grade | Perfect prep | 3–4+ weeks |
To extend wear, apply cuticle oil daily (it keeps the nail flexible and reduces lifting), wear gloves for cleaning and avoid picking at any lifted edges. If lifting starts, resist the urge to peel. A small brush dipped in gel and a quick cure can patch a lifting edge and buy you a few more days of wear.
Manicure Alternatives Worth Knowing
Not everyone wants to commit to gel nail polish. Some people have gel polish allergy concerns. Others want something quicker or less intensive. The good news is that there are several excellent manicure alternatives that deliver different trade-offs between ease, longevity and nail health.
Dip powder nails also called dip powder manicure use a pigmented powder and a bonding liquid instead of gel and UV light. They last about as long as gel, don’t require a lamp and are often considered gentler on the nail plate. Press-on nails have had a massive comeback and now come in salon-quality finishes that last one to two weeks with proper adhesive. Gel-effect polish and peel-off nail polish require no lamp and remove easily without acetone. For those seeking safer nail polish alternatives with no compromise on looks, these are all worth trying.
| Alternative | Longevity | Lamp Required | Removal |
| Dip Powder Manicure | 3–4 weeks | No | Acetone soak |
| Press-On Nails | 1–2 weeks | No | Warm water / tab |
| Gel-Effect Polish | 5–7 days | No | Regular remover |
| Peel-Off Polish | 3–5 days | No | Peel off |
| Standard Polish | 3–7 days | No | Regular remover |
Frequently Asked Questions
Can you remove gel nail polish at home?
Absolutely and millions of people do it every day. The acetone soak off method works well at home. Buff the top coat, soak cotton balls in 100% acetone, place them on your nails, wrap with aluminum foil wrap and wait 10 to 15 minutes. Use an orange stick to gently push off the softened gel. Apply cuticle oil and hand moisturizer immediately after. The key is patience never peel or force the gel off.
Does gel nail polish damage natural nails?
Gel nail polish itself doesn’t damage nails. Improper technique does. Over-buffing, peeling during removal and skipping nail hydration aftercare are the real culprits behind damaged nails after gel polish. Temporary nail damage like nail brittleness or peeling nails can appear after long gel use, but it’s reversible with proper care and a nail recovery period. A dermatologist can assess serious cases.
How often should you take breaks from gel polish?
Most nail health professionals recommend taking a two to four week break after every three or four consecutive gel cycles. During your break, use a nail strengthening treatment daily and keep nails hydrated with cuticle oil and hand moisturizer. If your nails show signs of weakened nail plate, nail grooves or persistent white nail spots, take a longer break and focus on full nail recovery before reapplying.
Can regular polish be used over gel nails?
Technically yes regular nail polish can be applied over cured gel nails. It’s a way to change your color without a full removal and reapplication. However, the standard nail polish won’t last as long over gel as a true gel color would. When it’s time to remove it, use a non-acetone remover carefully acetone can soften the gel underneath and cause lifting. For the cleanest results, a full gel removal and reapplication is always the better choice.
Conclusion
Gel nail polish is one of the best things to happen to nail care in decades. It lasts longer, looks more beautiful and when applied and removed correctly keeps your nails in great shape. From understanding nail polish curing science to mastering the buff, soak and wrap removal method, every step matters. Your nails deserve the care.
Whether you’re investing in a quality DIY gel nails kit at home, visiting a nail salon for a professional gel manicure or exploring the growing world of gel nail polish price in Pakistan options, the fundamentals are the same prep carefully, cure properly, remove safely and hydrate consistently. Take breaks, listen to your nails and treat them with the same respect you give your skin. So which gel nail color are you reaching for first? Drop your answer in the comments below!


